May 26, 2013

DIY _ ladder

 This is a tutorial on how to make your own ladder. Mine is only for decoration purposes but it could be used as a proper ladder if needed. 
What you'll need:
_ wooden sticks that won't break under the weight of an adult. Depending on what type of wood you find, they'll need to have various diameters. How many depends on how high you want to make it. I had 2 1,5m long sturdy branches, and 4 branches of the same length, about 40cm long.
_ String. I used natural string twine.
_ a hand saw if they're not already in the right lengths.

 
I often start DIY projects without actually knowing what I'm going to do exactly or how it'll turn out. The gardener in the park downstairs had just cut of some Birch branches (which happens to be my favorite tree after the olive tree). So I took some of them without knowing what I was going to do with them. This is what I came up with, and now that I have a ready ladder, I actually don't know what I'll do with it. Haha. Any suggestions?

1. Use your two most sturdy branches as your vertical ones. Hold your smaller branch horizontally and tie your string around both. Wrap the string diagonally and tie a double knot the first time and then continue to wrap it around: diagonally in front, behind and up diagonally, around the top, diagonally down, in front and diagonally up.
If you are going to be using this ladder for real, you'll need to wrap it around more times than I have done here.


The finished ladder, which I'm still not sure what I'm going to do with it. But it looks good, doesn't it?
I'm either thinking to hang small pots from it, or photos, or actually, I have no idea!

DIY _ tin tea box

This is a sweet vintage look DIY tutorial. The good thing about following a tutorial is that someone has tried it before you and can teach you about which mistakes they made. It took me a few goes to get this right, so you can go ahead and do it well straight away!
You'll need:
_ an empty cookie tin 
_ spray paint in 2 colours
_ a piece of card
_ a colourful piece of rigid paper (I used some tapestry I had at home- I ordered a free sample for another DIY project)
_ scissors
_ tea bags

Step 1. Get any dogs or children out of the way. My curious chihuahua was there the whole time :-p


2. Place some paper down in order not to get paint on your floor. I did all this on the balcony as the smell of the paint isn't very pleasant. Spray the tin on the outside. Let it dry completely (follow times given on spray can). I think it's about 20min for touch dry and several hours for complete dry. You only need to do 1-2 layers of your first colour.

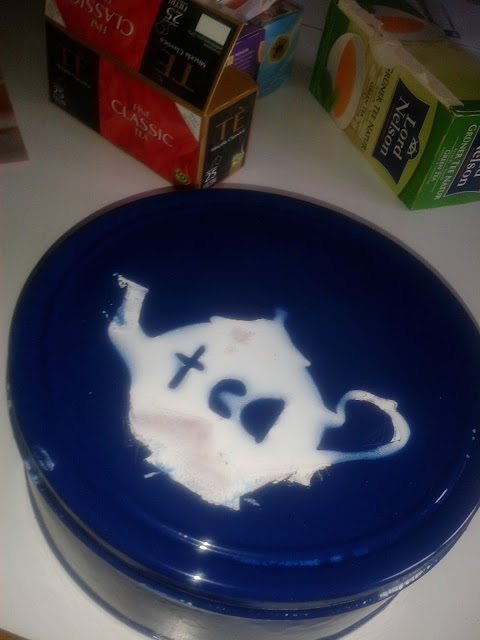
Cut out your shape on a piece of card. I got inspiration from an old vintage tea-pot. Place it on the lid and spray with your second colour.

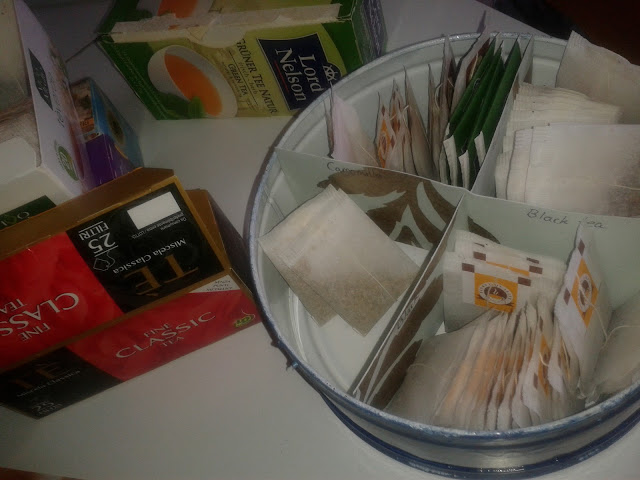
In order to create a division for the different types of tea, measure the diameter of your cookie tin and cut two strips that are l=the diameter of your tin and h= slightly less than the height of your tin. Cut an incision in the middle of both, half way through.

The incision will allow the two pieces of card to fit into each other.

Write the names of the teas. You'll need to think a little bit in order to write it in the correct place. On the left of one strip and the right of the other, so that when they are put together you'll have the name on both sides.


Place the tea bags in their compartments.

Finished result.
 Now, in order not to make the same mistake as me:
1. Chose the right type of paint! a water based paint will not stick to the tin!
2. Wait! Let the paint dry before doing the next layer. I wasn't patient enough
3. Don't paint the inside of the tin! The spray-paint smells for a long time afterwards and is absorbed by the tea. I had to through the first bunch of tea-bags out and do it again.

DIY _ tin candle holders

 This DIY project is very simple. Wash your empty cans and take off the label. You might need to soak it for a short while in order to make it come off completely.
You'll need:

_ tin cans
_ a nail

_ a hammer
_ tea light candle

Take a nail and simply hammer in holes randomly in your tin can. It's easier to get it through if you place the nail in the down-curve of the tin. If you like you can also make patterns (hearts, circles, etc)
When you have enough holes you're done! You can either hang the cans up by threading a string through 2 of the holes or simply place them on your table as they are.
I hung mine up originally but took them down as the wind made them rattle, which was annoying. So now they're simply on the table and they look great. The light is really sweet and romantic and perfect for a DIY event.