November 24, 2013

DIY Christmas decorations _ Christmas stars / flowers

CHRISTMAS STARS / FLOWERS

This must be one of the easiest, yet cute decorations to make! Each star takes 2min to do and the cost is basically 0.
You'll need:
1 toilet paper roll per star (or decorative paper)
scissors
stampler
thread
hole punch

1. Cut the toilet role into 6-8 pieces (each one is around 1 cm thick). Each circle will be a petal
2. Staple two circles together at the bottom of each one. You will now have 4 pairs.
3. Start stapling  the pairs together.
4. Punch a hole in one of your "petals" and thread a thread through the hole. Make it as long as you wish depending on if it will be a Christmas tree decoration, or as part of a garland.
DONE!
----
If you are using decorative paper instead of a toilet paper role you'll have to add a step.
You will have to hold the circles in place when stapling the pairs together, as each one won't be a circle, but only a strip. It just takes a little extra patience, but it isn't too complicated.
The paper I used for these is wallpaper samples that I had left over from my wedding DIY decorations. In particular the unique ceremony programs:
http://pulmonate.blogspot.it/2011/12/wedding-inspirationceremony-program.html

What you need


2. cutting the toilet role into 1cm thick pieces.

3. Stapling the pairs together


Stapling the pairs with each other, creating our star / flower


The extra step when one is using decorative paper instead of toilet paper roles.


The finished star / flower.

DIY Christmas decorations _ clay Christmas tree decorations

This is a fairly simple decoration to make and the result is very sweet.
You will need:
Clay (white or natural)
cookie cutters or a knife
a small round object (I used a pencil)
a roller (I used a bottle)

Work the clay until it is soft.
Roll it out until it is about 3mm thick. Any thinner and you risk it to break and any thicker means it will take longer to dry.
Place your cutters out onto the clay in order to optimize the space. A smart way to get "2 in 1" is by placing a circular cutter and then a smaller cutter shaped as a heart or a star on the inside. This way you have one that has a circular shape with a star or heart hole, and one in the shape you placed on the inside.
You can carve a little message into the clay if you wish, or leave it plain. You can carve the year, family members names, or messages such as MERRY XMAS, LOVE, HOPE, etc.
Make a small hole in the top part of the shape in order to be able to thread a thread through the hole and hang it up.


An example of "2 in 1" shapes. A Circle with a heart or a star inside creates 2 pieces.


Clay decorations are put on a piece of paper to dry.

November 16, 2013

DIY Autumn Christmas Decorations

As soon as it starts getting cold, I start thinking of Christmas time. I love this time a year when you can spend time making decorations, drinking hot drinks, and singing.
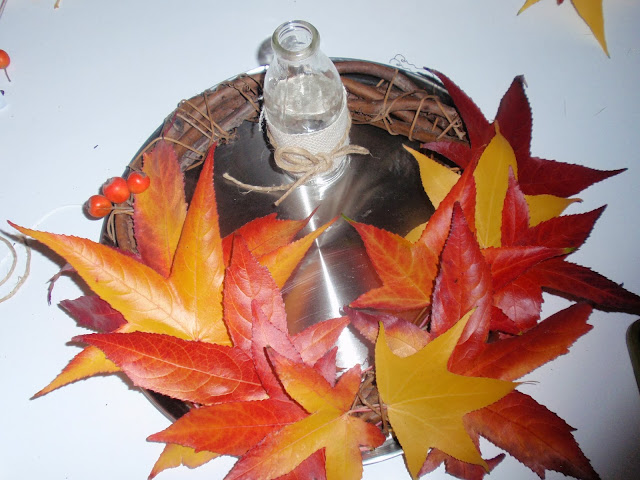
I started with two wooden wreaths about 20cm in diameter. They are just twined together and held together with a thinner twig wrapped around the thicker ones.
I collected some colourful leaves and berries. One of the wreaths is a table decoration and the other will hang on the door.


These are the two wreaths. The table decoration to the right, which isn't finished yet. I want to add some moss to cover the plate and add some berries and pine cones.

The colourful door wreath.


The table decoration with a candle and chocolate chip cake.